
~Goode Things To Know. General Rules For Punching~
~Punch Needle Embroidery~
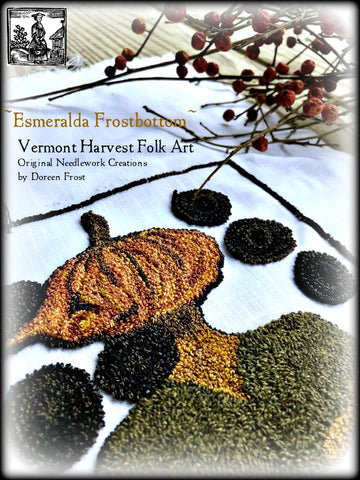
~GOODE THINGS TO KNOW~ General rules for punching by Doreen Frost. In this booklet you will find my tried and true methods for punching, my favorite tools and helpful tips and tricks.
Punch needle is a form of embroidery that uses a hollow needle to create loops of thread on fabric. Also known as thread painting for the complexity and texture of the design that can be created with this technique. This art form is often referred to as miniature rug hooking.
**FIRST AND FOREMOST…..One of the most important things I can tell you, when you are just getting started with Punch Needle embroidery is…. be patient with yourself!! Do not expect your first piece to look perfect because IT WONT! I think I was 4 projects in before I started liking my results. Just concentrate on getting your rhythm down, making sure you have the technique correct. If you are punching along and your loops are staying in, your loop height is uniform, and your lines are nice and tight…you’ll soon be creating gorgeous results!!
Okay..now here are my tried and true methods for great results.
Transferring your design to the weaver’s cloth ~ the easiest way to transfer your image from paper to the weaver’s cloth is by using a light box. They are not very expensive and work wonderfully. However, if you do not happen to have a light box, my 2nd choice is to use a transfer paper. My favorite is Loew Cornell GREY Transfer Paper. Simply tape (taping is VERY important) your weavers’ cloth to a flat surface, place the transfer paper, dark side down, in the center of your weavers cloth and tape in place. Now tape your image (template) on top of the transfer paper, facing up so you can see your design, and simply trace over the design with a fine tip marker or sharp pencil. You may also use my old standby (which is what I did for my first TWO years) which is by using a sunny window & some tape!! Simply tape the pattern template to a DRY, sunny window; center your weaver’s cloth over the template and tape in place. With a fine tip marker, transfer your design onto the weaver’s cloth.
Transferring your design to the weaver’s cloth ~ the easiest way to transfer your image from paper to the weaver’s cloth is by using a light box. They are not very expensive and work wonderfully. However, if you do not happen to have a light box, my 2nd choice is to use a transfer paper. My favorite is Loew Cornell GREY Transfer Paper. Simply tape (taping is VERY important) your weavers’ cloth to a flat surface, place the transfer paper, dark side down, in the center of your weavers cloth and tape in place. Now tape your image (template) on top of the transfer paper, facing up so you can see your design, and simply trace over the design with a fine tip marker or sharp pencil. You may also use my old standby (which is what I did for my first TWO years) which is by using a sunny window & some tape!! Simply tape the pattern template to a DRY, sunny window; center your weaver’s cloth over the template and tape in place. With a fine tip marker, transfer your design onto the weaver’s cloth.
**GRIPPER FRAMES AND HOOPS ~ keeping your fabric drum tight is the key to mastering the art of punch needle. If your fabric isn’t tight in the frame/hoop you will soon find yourself frustrated and your work a mess.

A note on what I use… use a wonderful frame made by Alice & Sonny Frazier of Folk Art Primitives. I LOVE IT! You may use any gripper frame or LOCKING LIP hoop you wish. If using a locking lip hoop, I highly recommend the Morgan hoop. Whether using a frame or a hoop, give yourself an inch or two of empty weaver’s cloth between the template and frame/hoop for smooth, trouble-free punching.
** Place your design on your frame OR in the hoop …For the Hoop; lay your design, face up over the smaller hoop and then place the larger hoop, containing the locking mechanism, over the design and tighten until it is drum tight. Be sure to keep the design centered. If using a frame, center your weaver’s cloth over the frame, with the template centered, and slowly, and carefully tighten the weavers cloth onto the gripper strips. Now your design is ready to punch.
**Punch Needles ~ My favorite needle to work with is the Ultra Punch Needle. *the booklet that came with my first Ultra Punch Needle is how I taught myself how to punch!!! All my patterns use this needle but feel free to use whatever needle you prefer.
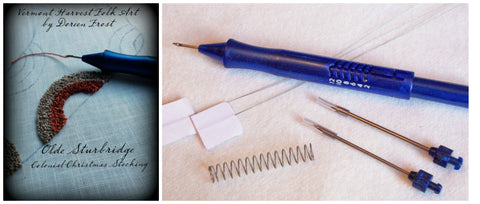
**Stock up on needle threaders. You HAVE to have them to thread your needle & they are DELICATE, break easily and somehow disappear into thin air.
Of Note…when you first start punching your shapes the small areas, in particular, will not be very clearly defined. Take heart. Once you start filling in the areas around it, everything will look great.
**Working/Punching** Hold your needle like you would a pencil with the needle resting between your thumb and pointer finger. Some folks fine they are more comfortable punching with the needle straight up and down and some folks, like me, prefer punching with the needle at a slant, resting in the groove between your thumb and pointer finger. Either way will work if you remember the side of the needle leads the way. The scooped out/bevel of the needle will face the inside of your work and the flat/back of the needle (where your thread comes out) will be to the outside of your work. Again…**You will punch toward you, in a circular manner, with the SIDE of the needle leading the way.
The rhythm is….. PUNCH, LIFT, SLIDE.

#1. Punch, down into the fabric…
#2. Lift, until you see the tip of your needle (do not lift the needle fully away from the fabric)
#3. Slide the needle over one needle’s width….
#4. REPEAT…...Punch, Lift, Drag
If you are right handed the bevel (or open area) of the needle should face left. If you are left handed, the bevel of the needle will face right, punch toward you in a circular motion turning your hoop or frame as you work. Your already punched rows should be behind the back of the needle.
Things to remember…..
~Begin with the smaller areas.
~Punch, just inside or on the lines of the design.
~Always outline first and then fill in.
Punch in a circular motion…doing small circular areas at a time. This is how I achieve the look that I achieve with my punching *Hug each row of stitches tight to the previous row; however, do NOT punch on top of them. When punching near small areas/shapes, etc. or an area of a different color, point your needle tip away from the already punched area, this will help keep you from punching on top of the already punched rows. Be sure to read through the direction that came with your punch needle as they contain very valuable directions and information.
Take your time & HAVE FUN :).